Updated: | Originally published: | By Susanna Fagerholm
Cyclr offers a selection of tools in the integration workflow builder that allows users to add logic to their integration workflows. These tools are not related to specific Connectors and can be dragged and dropped into workflows as steps.
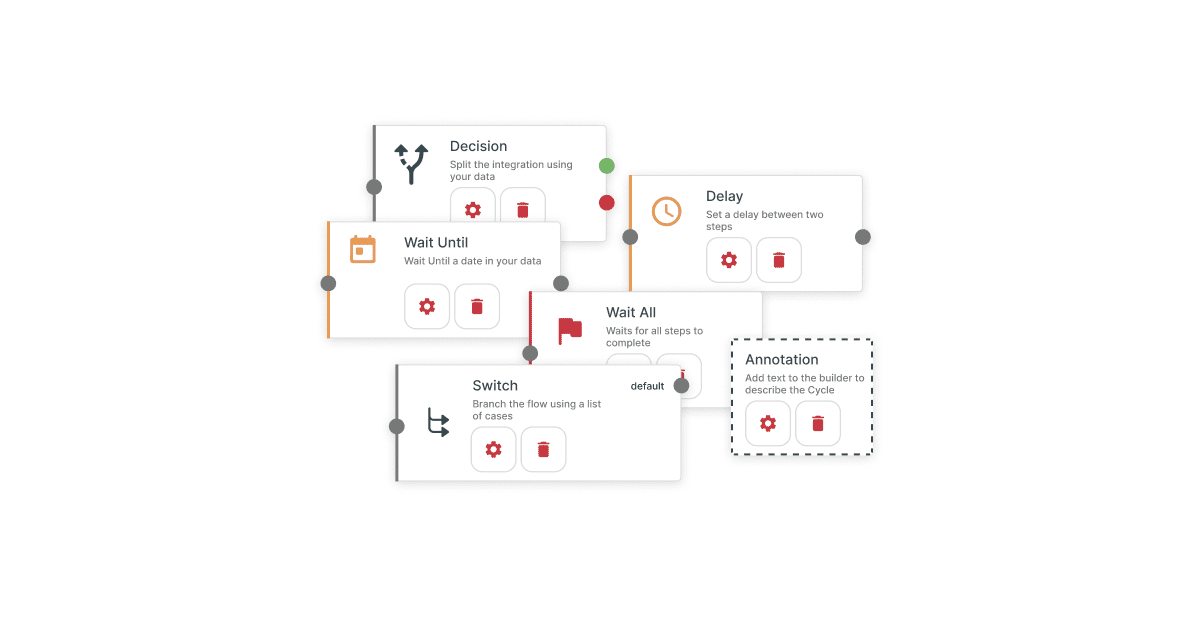
There are six primary logic tools available in the Builder; Decision, Delay, Wait Until, Wait All, Annotation, and Switch. They enable users to add further flexibility, timing, decision-making, and clarity to workflows.
Let’s take a deeper dive into these tools and have a look at their functionality and practical applications.
Decision Step: Guiding Data Through Logical Paths
The Decision step makes it possible to branch workflows down two separate paths, depending on the logic added to it. It uses Boolean values and has two Exit points, TRUE and FALSE.
There are 10 different condition criteria that the Decision Step can check. Users can only select one condition per Decision step.
Here’s a quick guide on what each of the conditions mean and how they differ from each other:
- Exists: Checks if the variable or object that has been set is initialised in the workflow. The Exists condition can be used to see whether a variable or an object is present. Also if it has been created before attempting to use it. This can prevent errors in the cycle run.
- Not Exists: The opposite of “Exists”, is “Not Exists” checks that the object has not been created. It can be useful in determining whether something should be initialised or created if it hasn’t been already. It can also ensure it is excluding a specific piece of data.
- Equals: Compares two values and checks whether they are equal to each other. This can be used when users want to perform an action only if the variable matches a specific value exactly.
- Not Equals: Compares two values and checks that they are not equal to each other.
- Greater Than: Evaluates if one value is greater than the other and it could be used to check if an object was created after a certain date, for example.
- Less Than: Evaluates if one value is less than the other, it could be used to check if an object was created before a certain date, for example.
- In: Checks whether a value exists within another value, set, list or range. This is perfect for structured, exact matches where the values are discrete and finite. Also if users want to exclude partial matches.
For example, searching for contacts or addresses with the Country Code “US” (United States) using Contains could incorrectly match values like “AUS” (Australia) or “RUS” (Russia). With In, users can avoid those errors and only get exact matches to “US”.
Avoid using In when working with free text fields or other unpredictable and unstructured data with inconsistent formatting.

- Not in: Opposite of “in”, this checks that one value does not exist within another value, set, list or range.
- Contains: Verifies if a certain value is contained within a certain piece of data, like a list or string.
Contains condition is ideal for searching within unstructured or free-text fields. Especially, where partial matches are relevant or users need flexibility in the results. Unlike In, which requires exact matches from a predefined list. Contains allows users to detect whether a substring exists within a larger piece of text.
For example, users could use Contains for free-text fields such as client notes, descriptions, or comments. This will identify keywords and get the support team’s eyes on anything containing the word “error”.
Avoid Contains when working with structured data like IDs or codes that could cause unintended matches.
- Not Contains: Opposite of “contains”, checks that a certain value is not contained within a certain piece of data.
Most of these criteria (with the exception of Exists and Not Exists) require some data against which they can compare the input. Users can pull this data in from a previous step. Alternatively they can use the Type a Value option to provide a fixed value for the comparison or select a MergeField.
By default, the Decision step splits the source step data if it’s a collection. This means that if the source step is a collection, the items within it are split into two collections that go into True and False branches separately. However, users can turn this off where needed in the step’s Advanced Settings.
Decision Step Use Case
The Decision Tool provides a range of conditions that allow users to route data dynamically through different workflow paths. Each condition serves a unique purpose, offering flexibility to address various use cases.
One possible example is a workflow that routes orders down different processes based on the customer’s shipping location. Domestic orders follow one process, while international orders follow another. With the In condition, users can set up the Decision step to identify the domestic Country Code from the address. Here the TRUE path will follow the domestic process, whilst FALSE takes all others down the international order funnel.
Delay & Wait Until: Introducing Strategic Pauses
The Delay step is a perfect way to pause an integration workflow by introducing a timed delay between two steps. To set up users need to define the number of seconds, minutes, or hours until they want the next step to act.
With the Wait Until tool, users can set the workflow to wait until a certain date and time.
Simply map the required value in the step, and if necessary, set an offset of for example 30 minutes before or an hour after the defined value. Bear in mind that the date must be within 31 days or the cycle will not complete.
When using Delay Steps or Wait Until Steps, users can use the “Type a Value” option and provide a fixed value for Cyclr to use. Alternatively, users can map from a previous Step to provide a value that changes depending on the data.
When mapping a value from a previous Step to a Delay or a Wait Until, Cyclr will automatically perform Collection Splitting. Especially, if the value comes from a list of data. The reason for this is that each item in the list could have a different amount of time to wait. Therefore, each must be handled as a separate transaction to be processed correctly.
Delay & Wait Until Use Case
The Delay and Wait Until tools both manage timing in workflows, but they excel in different scenarios.
The Delay tool works best when users need consistent pauses between actions, regardless of specific times. For example, if an integration is processing customer records sequentially to ensure smooth handling across systems. The Delay step can introduce a brief pause (e.g., 5 seconds) between each transaction, preventing system overload.
In contrast, the Wait Until tool is ideal for workflows requiring actions at specific times or dates. For instance, if a user needs to send an email reminder exactly 24 hours before a scheduled event, the Wait Until tool ensures precise timing by pausing the workflow until the designated moment.
While Delay ensures controlled spacing between actions in ongoing workflows, Wait Until provides accuracy for time-sensitive operations. Choosing the right tool minimises the risk of inconsistencies or missed deadlines.
Wait All: Synchronising Transactions
The Wait All step allows users to set up a pause in a workflow. This waits for all previous steps to complete before continuing the cycle. It is especially useful when or if a cycle is relatively complex since it allows users to check that all required steps are completed before a certain action is attempted.
This step requires no setup and will prevent the step after it from activating until all actions are completed.
It is important to note that any steps after a Wait All step cannot be connected to steps before the Wait All. Cyclr treats them almost as a separate transaction. If users need to transfer data across the Wait All step, they can do so using the Cycle Storage Utility Connector.
Wait All Use Case
For example, a workflow processes a list of customer orders, a user may need to generate individual invoices for each order and then send a consolidated report to the accounting team. The Wait All tool ensures that all invoice generation steps are finished before triggering the report creation.
Unlike Delay, which introduces pauses between sequential steps, or Wait Until, which schedules actions at specific times, Wait All focuses on task completion across parallel processes.
Annotation: Documenting Integrations
The Annotation tool allows users to add text to the Builder to describe the Cycle. This is especially useful for larger workflows where users want to note what different parts of the workflow are for. This allows other team members to easily identify the most crucial steps in the integration.
Due to its flexible nature, the Annotation step can be added to almost anywhere in a workflow. Regardless of other steps. Users can place it easily before, after, over (but not on top), under or even between steps without disrupting the cycle.
As the Annotation step does not manage data within the cycle, it does not require much setup. All users have to do is drag it onto the canvas and place it where required. Then add documentation text into the text field available behind the Setup button. Press save and the annotation will be visible on the canvas.
Why use Annotation?
For larger teams, annotations act as signposts, helping collaborators understand complex workflows. Without annotations, the logic behind different decisions may not be immediately clear to other team members. As well as future users who will maintain the workflow.
Adding annotations clarifies the rationale for important steps, ensuring consistency, improving collaboration, and reducing the time needed for updates or troubleshooting.
Switch Step: Multi-Path Decision Making
The newest addition to our Tools range, the Switch step works similarly to the Decision step, as it allows users to split workflows down separate paths depending on the data. However, where the Decision step only has two outputs, True or False, the Switch Step can handle multiple different paths.
For a detailed overview of the Switch Step, including setup instructions and additional examples, check out our previous deep dive into the Switch step on the Community Site.
Practical Tips for Using Cyclr Builder Tools
To make the most out of the potential of these tools, it’s essential to integrate them thoughtfully within workflows. Here are some best practices to follow when building workflows:
Plan Before Building
Before diving into workflow creation, map out the process on paper or using a flowchart tool. Identify where tools like Decision, Wait All, or Delay will add value to an integration.
Document Thoroughly
Use the Annotation tool liberally. Documenting why specific steps exist or what conditions drive decisions helps collaborators and ensures long-term maintainability.
Test Iteratively
Cyclr Builder allows testing within the development environment. As tools are added to a workflow, test them incrementally to verify functionality and ensure they meet requirements.
Monitor Workflow Performance
Once live, use Cyclr’s monitoring features to track workflow performance. Tools like Delay or Wait Until can have time-based implications; ensure they operate as expected without unintended delays or bottlenecks.
The Impact of Cyclr’s Logic Tools on Integration Efficiency
Cyclr’s logic tools are more than features, offering practical solutions to help users design smarter and more efficient workflows. By incorporating them, teams can:
Reduce Complexity: Tools like Decision and Switch simplify branching logic, making workflows easier to build and maintain.
Enhance Timing Precision: Delay and Wait Until introduce timing controls, enabling workflows to align with business needs.
Streamline Batch Processing: Wait All ensures that batch processes are completed efficiently and cleanly.
Promote Collaboration: Annotations foster teamwork by promoting communication and reducing barriers to collaboration.
Conclusion
The Tools in the Cyclr Builder empower users to design integrations that are not only functional but also intelligent and adaptive. By leveraging features like decision-making, dynamic delays, and synchronisation, users can create workflows that meet the unique demands of their business.
Whether a developer building complex integrations or a citizen integrator automating routine tasks, these tools provide the foundation for success. Explore them further in a new integration project to unlock the full potential of integration workflows.
Want to learn more about Cyclr’s Logic Tools? Get in touch with the team, they are more than happy to answer questions and provide product demos.


