
Updated on by Hayley Brown
Customer lifecycle management (CLM) tracks a customer’s journey from initial interest to brand loyalty. The whole process uses numerous SaaS platforms from CRMs, social media and other marketing applications.
This process often involves numerous SaaS platforms and tools to capture data, we’ve put together some integration tutorials to demonstrate how data added to one SaaS application, HubSpot for instance can be automatically added to another.
CLM Integration Overview
This tutorial demonstrates how to create integrations between a native SaaS application and HubSpot CRM without coding. We start by installing the HubSpot Connector using the provided credentials. In the first example, we will sync all contacts, and then only sync new contacts. We will be using Cyclr, an embedded iPaaS (integration Platform as a Service) to build the integration, filter and manipulate the data.
We will also cover how to map fields, handle updated data based on timestamps and add logic with Cyclr’s Decision Tool. Finally, we’ll test the integration to demonstrate how the integration will only show the data requested and how custom data is manipulated as configured.
Watch the full HubSpot Integration Tutorial
Creating Integration Between SaaS Application and HubSpot
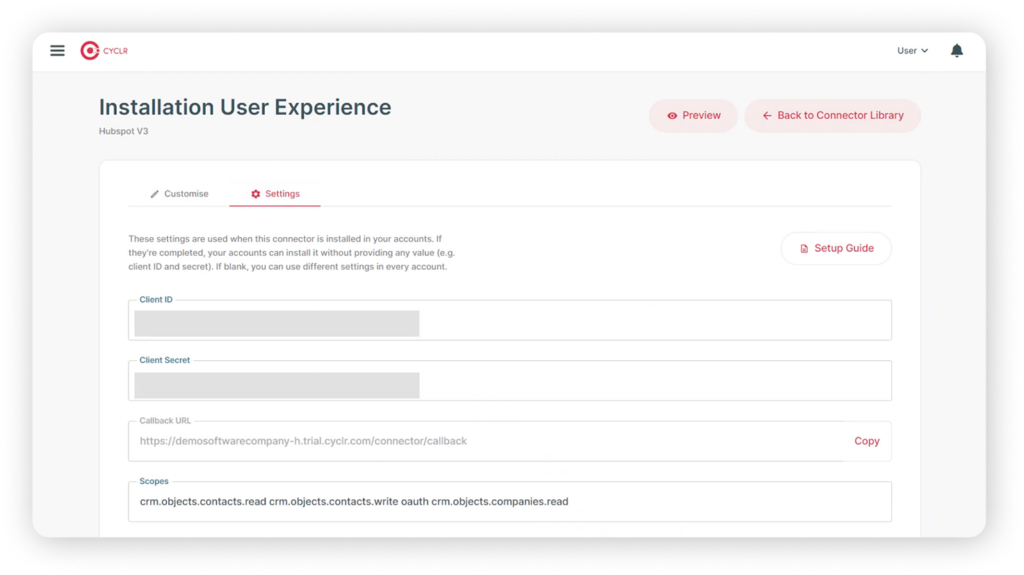
Firstly, you’ll need to install the HubSpot Connector and enter the required client ID, client secret, and scopes for authentication.
Next, create the first integration template by using the “List Contact” method from the HubSpot Connector and the “Create Contact” method from the SaaS Connector, and map the fields between the two platforms.
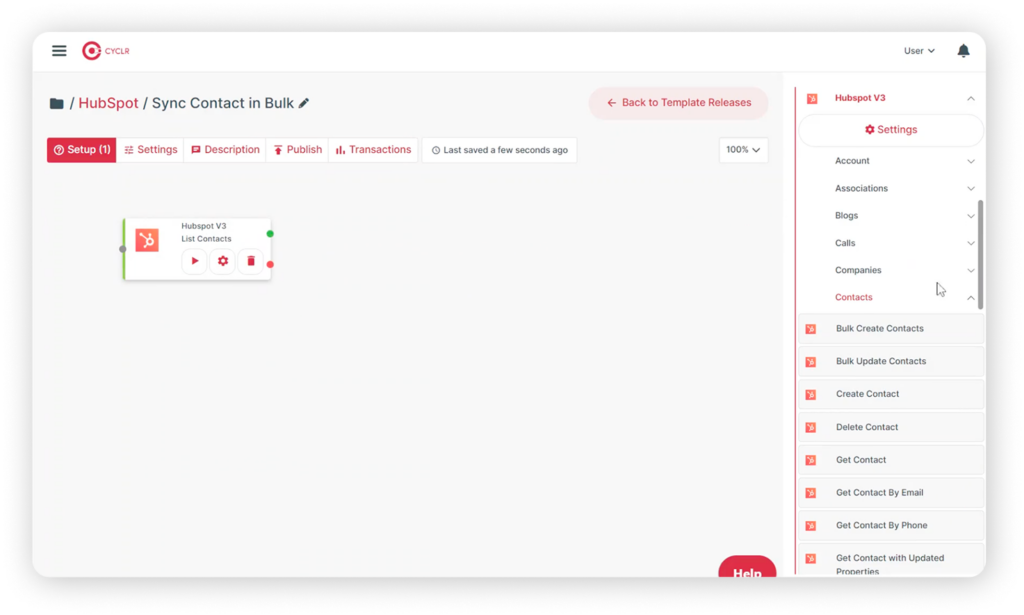
Building the First Integration Template
Now let’s build the first integration template, we’ll start by locating the HubSpot Connector under the Contacts category. From there, select the “List Contact” method and drag it onto the empty canvas space.
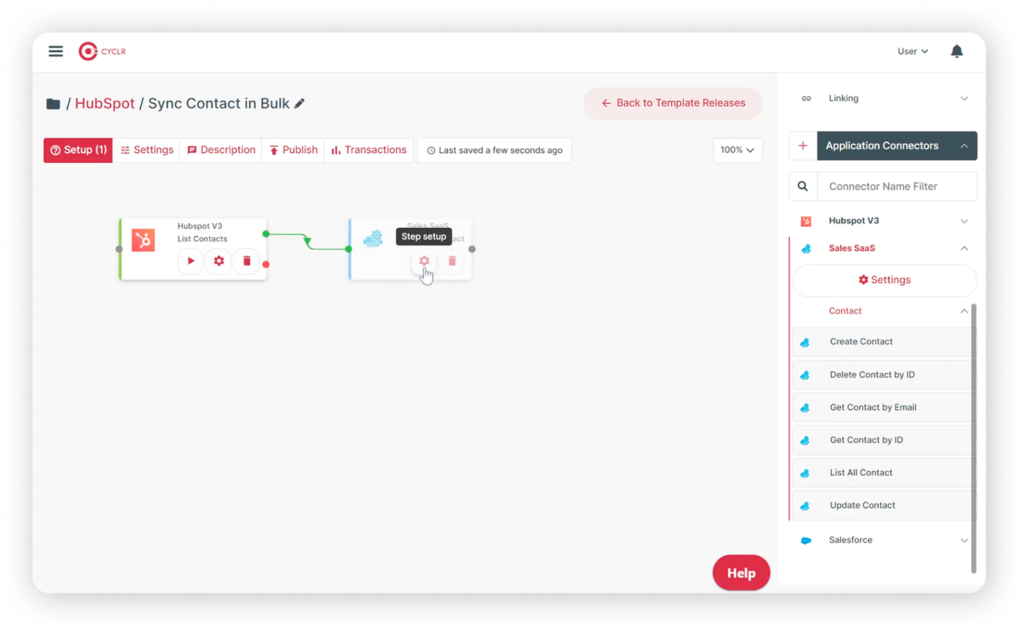
Next, add the “Create Contact” method from the sales SaaS Connector, and link the two steps together. Once they’re connected, open the field mapping table. The system simplifies this step by automatically identifying and suggesting related mapping fields for you.
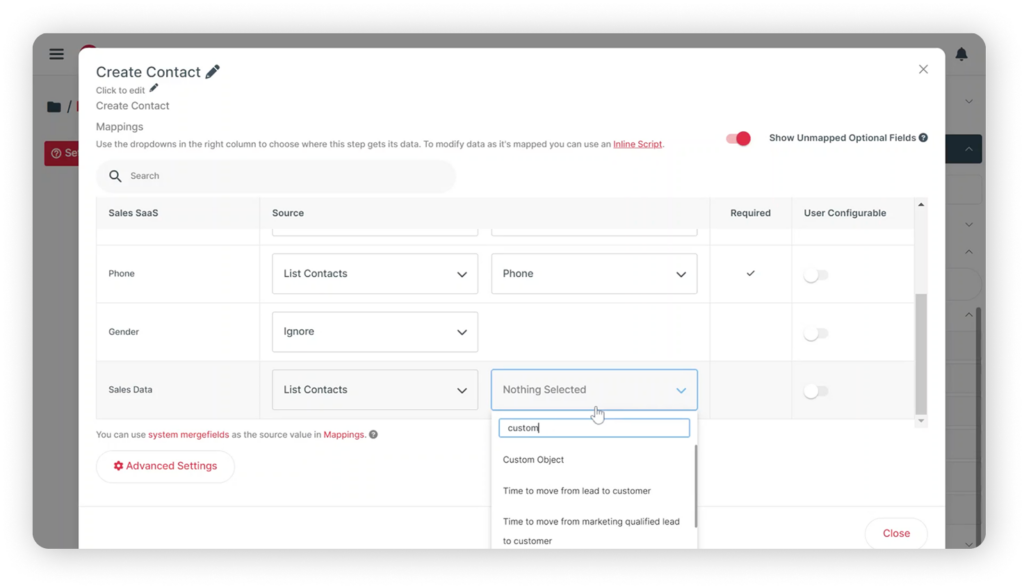
Let’s take a closer look at one specific field in your sales SaaS application. The data for this field should come from a custom object in HubSpot, even if it’s a custom field, Cyclr has already loaded it, making it available for selection. This ensures you have full flexibility when mapping fields between the two platforms.
After the setup is complete, you can configure the integration to run on a schedule that suits your needs. Options include minutes, an hour, a day, or even a week. For this demonstration, we’ll run the integration once for a quick test.
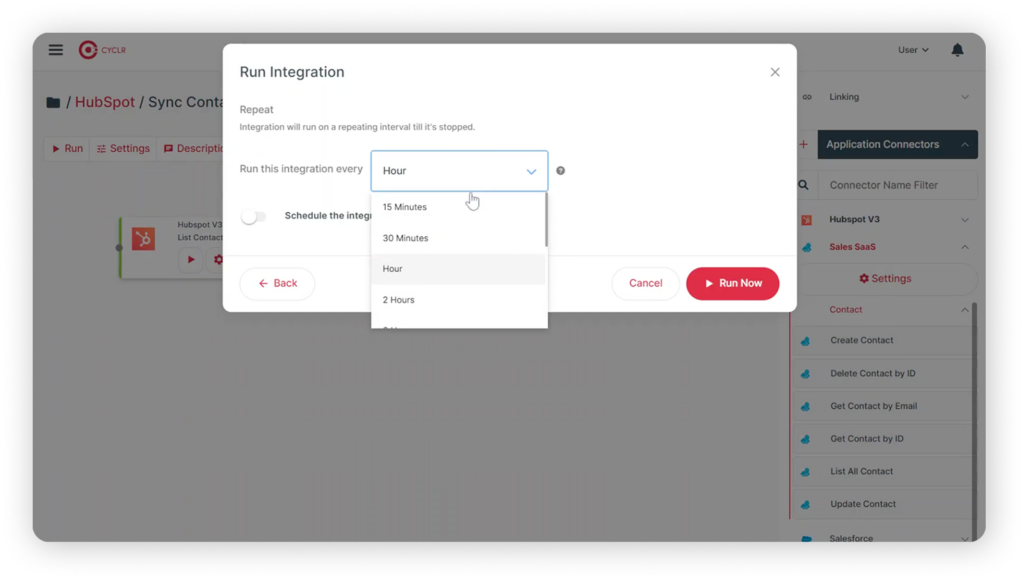
Once the integration is complete, you can review the integration transaction audit log. This provides a detailed record of all the transactions for your reference.
Modifying the Integration for Advanced Functionality
Now, we will modify the first integration example to create the second example, using the “List Updated Contacts” method from the HubSpot Connector and add a Decision Tool step to filter the records based on the presence of a phone number.
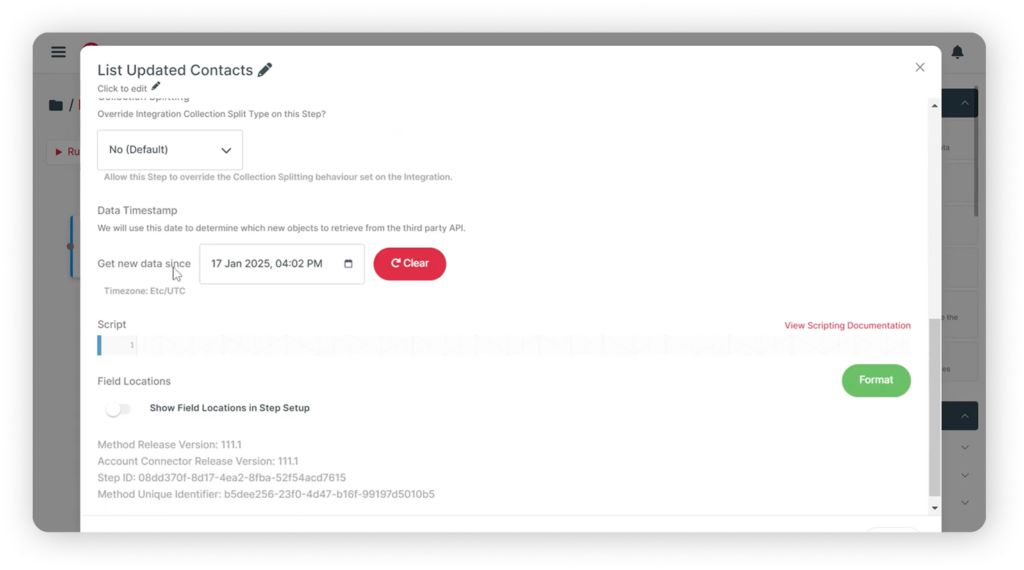
Let’s set up the first step, here you’ll notice a function designed to retrieve new data based on a data timestamp. This means the integration will only capture updated data from HubSpot that occurred after this specific timestamp.
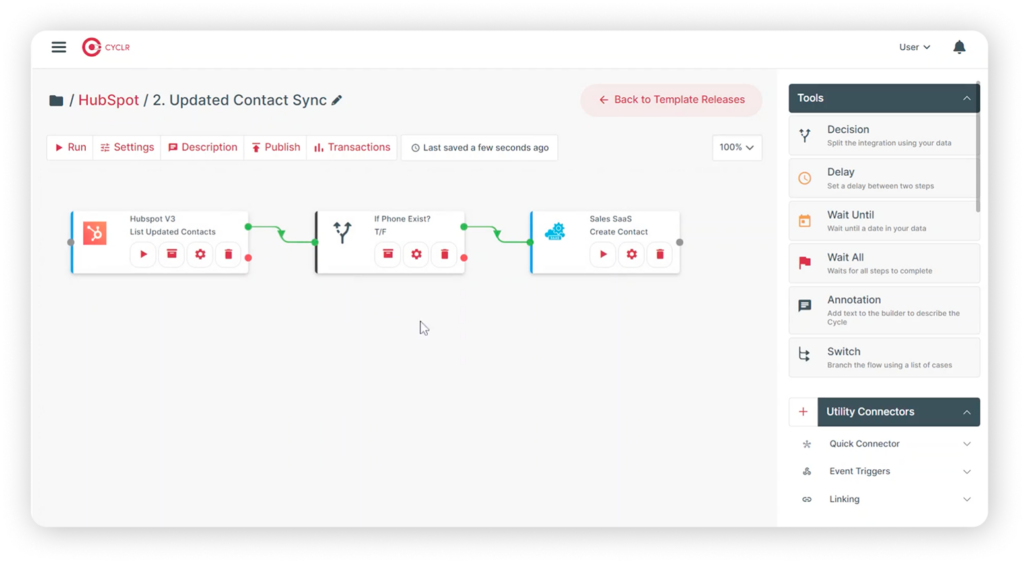
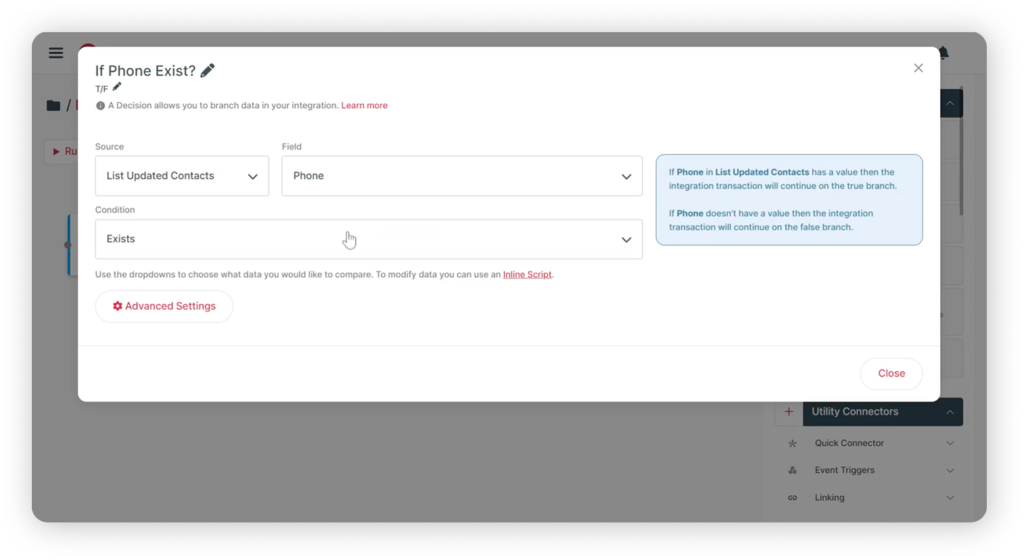
Next in the Decision Step, add a filter to check whether a phone number exists in the HubSpot record. If a phone number is found, the record will follow the green route in the workflow.
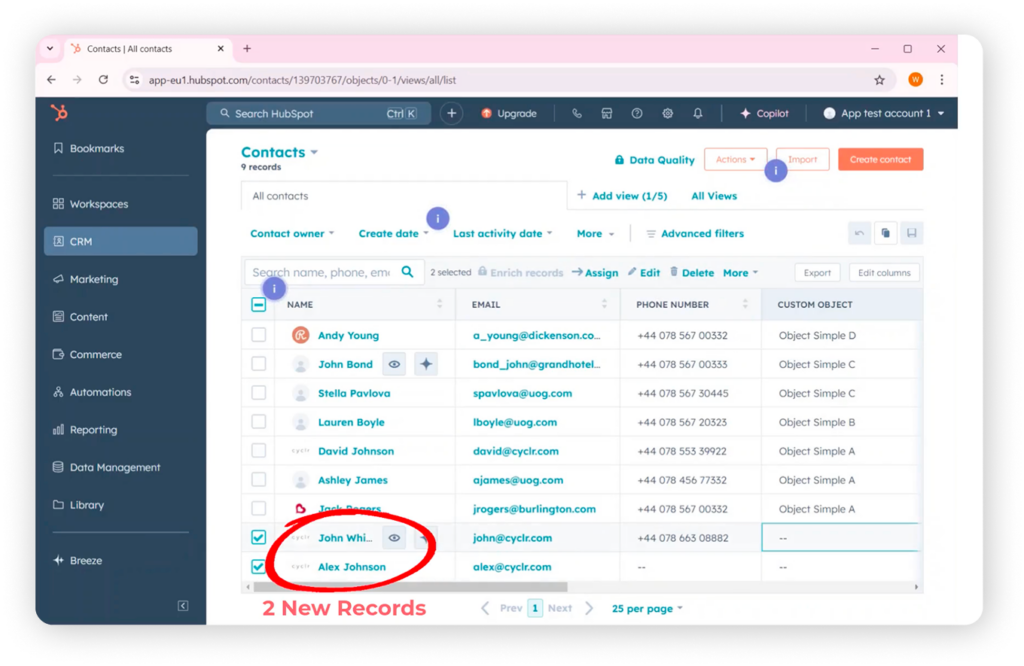
Now let’s move on to the create contact step. Here, we manipulate the data by adding an additional prefix to the custom data being synced from HubSpot, just like what you can do in an Excel spreadsheet. That’s it for the setup. Now we’ll create two new contacts in HubSpot, one with a phone number and one without.
Testing the Integration and Reviewing Results
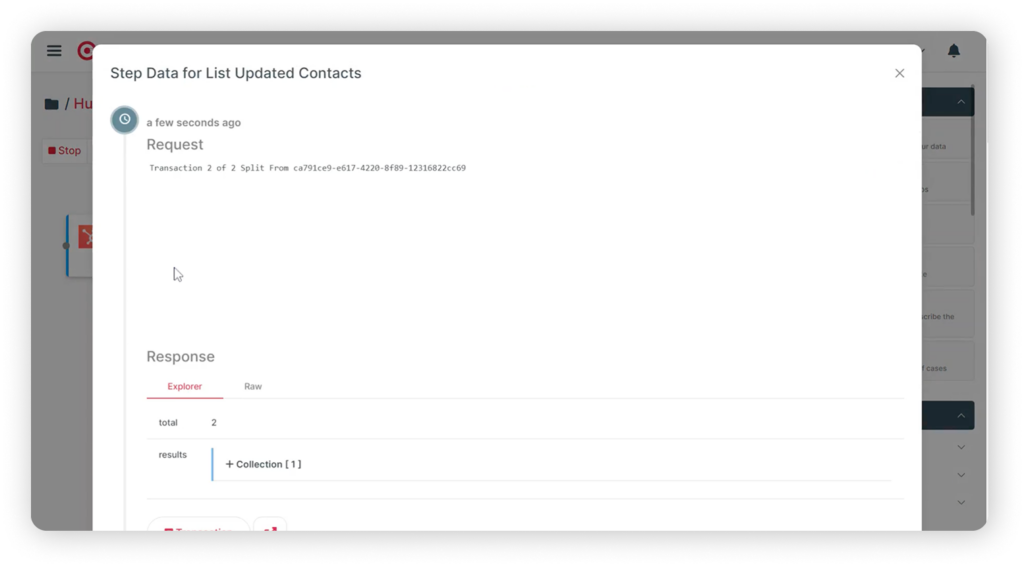
Lastly, we’ll run the integration and check the results in the audit log. We can see that only two new records are loaded. This is because the integration only processes updated records, instead of all records in the Decision Step, only one record passes through the filter as it has a phone number.
Finally, only one record is created in our sales SaaS platform, and you’ll notice the custom data is successfully updated with the additional prefix we configured. That’s it!
Advanced CLM Integration with HubSpot
Now we are going to take a look at an advanced integration scenario with HubSpot and Cyclr using Webhooks. Specifically, the integration will be triggered when a new contact is created in HubSpot. This sends a notification to Cyclr, which creates a new contact in the SaaS application and generates a task in HubSpot.
The integration workflow involves configuring a webhook URL, creating a subscription for contact events, and using low-code tools to map data between HubSpot and the SaaS application.
Watch the full HubSpot Advanced Integration Tutorial
Configuring HubSpot CRM Integration with Webhook
Firstly, we need to configure the Webhook connection. This is done by opening the basic settings of the HubSpot Connector in Cyclr. Here you’ll find the Webhook URL that will receive notifications. Copy this URL as you’ll need it for the next step.
Now go to the HubSpot developers app dashboard and select the application you’ve linked to Cyclr, then navigate to the Webhook section and paste the webhook URL into the target URL field.
Next, create your Webhook subscription. Since we’re working with contact, set the object type to contact, choose the listening event type created, and then activate the subscription with the Webhook setup.
Let’s build the integration workflow using the low code design tool in Cyclr. Start by selecting the Webhook method “Contact” created under the HubSpot connector category. Then find the “Get Contact” method, which we’ll use to retrieve the contact data. Connect these two steps in the workflow, and ensure the contact ID in the “Get Contact” method is mapped to the same field name in the Webhooks method.
Testing and Building the Integration Workflow
Now it’s time to test the setup, firstly, run the integration to start listening for events. We’ll create a new contact in HubSpot and hopefully, within seconds, the workflow will receive the notification and fetch the corresponding data. Finally, check the audit log to review the process and confirm everything worked as expected.
Let’s continue building the remaining part of the workflow. First, we will add the “Create Contact” method from the sales SaaS connector and link it to the previous steps, this involves doing some simple data field mapping between HubSpot CRM and your sales SaaS application.
Now to enable another automation, we’ll add the create task method to the workflow
we’ll configure the data mapping details to include feedback From the sales SaaS application back to HubSpot, CRM. Cyclr makes this process easy by auto-loading the relevant data for users to select, such as priority status and Task Type, simplifying integration setup, since tasks and contacts are related records.
Creating Associations and Final Workflow Test
We’ll take it a step further by creating an association specific to HubSpot CRM. In this step, we’ll link the contact and task together. The associated object ID will be the task ID which comes from the task created in the prior step. The association type is set to contact a task.
Using this same mechanism, you can apply similar logic to create associations between contacts and companies or deals and contacts, giving you flexibility in how you link the HubSpot record through Cyclr.
Conclusion and Encouragement
We’ll see the final workflow in action when we create a new contact in HubSpot, for this example, we’ll use the name Johnson. The integration immediately gets to work and within moments, the new contact is successfully created in the sales SaaS application.
At the same time, a new task is automatically generated with the assigned data from the sales SaaS application and seamlessly associated with the newly created contact in HubSpot.

